Before you start: choose the bag, not just the method
Water displacement is an air-removal technique. It does not turn an unsuitable storage bag into sous vide packaging, and it does not create the same seal as a vacuum machine. Check the current instructions for the exact pouch you own; category names such as “freezer bag” are not enough.
Why this needs a product-specific check: Anova’s current technique article recommends zipper-style freezer bags, and Douglas Baldwin’s technical guide describes heavy-duty resealable bags below about 195°F (90°C). However, Ziploc’s current official FAQ says only Ziploc Endurables should be used for sous vide and says its ordinary polyethylene bags should not. Follow the current instructions from the maker of your exact bag rather than a blanket recommendation.
| Your packaging | Use water displacement? | Decision rule |
|---|---|---|
| Resealable pouch explicitly rated for sous vide | Yes | Stay within the maker’s temperature, duration, fill, and closure instructions. |
| Reusable silicone pouch rated for sous vide | Product-specific | Use water displacement only if the exact maker’s air-removal and closure instructions permit it; silicone construction alone does not establish compatibility. |
| Ordinary storage or freezer bag with unclear instructions | Not yet | Check the manufacturer; choose purpose-built packaging if authorization is unclear. |
| Heat-seal sous vide roll or pouch | No | It needs a compatible heat sealer rather than a zipper-style displacement closure. |
For a deeper look at materials and changing manufacturer guidance, see our sous vide bag material and safety guide. If you need purpose-built alternatives, compare our sous vide bag options.
What you need
- An immersion circulator and a suitable cooking container
- A resealable pouch authorized for your intended sous vide use
- A separate bowl or container of cool water for displacement
- A clean towel for drying and checking the closure
- A bag clip or rack that will not obstruct the circulator’s intake or outlet
Using cool water for the sealing step keeps your hands away from a heated bath. Anova’s support instructions specifically recommend a separate container of cool water or completing displacement before the cooking bath heats.
Water displacement, step by step
- Prepare the food and work area. Follow clean and separate handling practices for raw food. Keep the pouch’s closure track free of seasoning, oil, and food particles.
- Use enough headspace. Place the food in one layer where practical and leave enough empty pouch above it to hold the opening comfortably. Move to a larger pouch if the food crowds the closure.
- Close all but one corner. Leave only a small escape path. A wide opening makes it easier for water or marinade to reach the zipper.
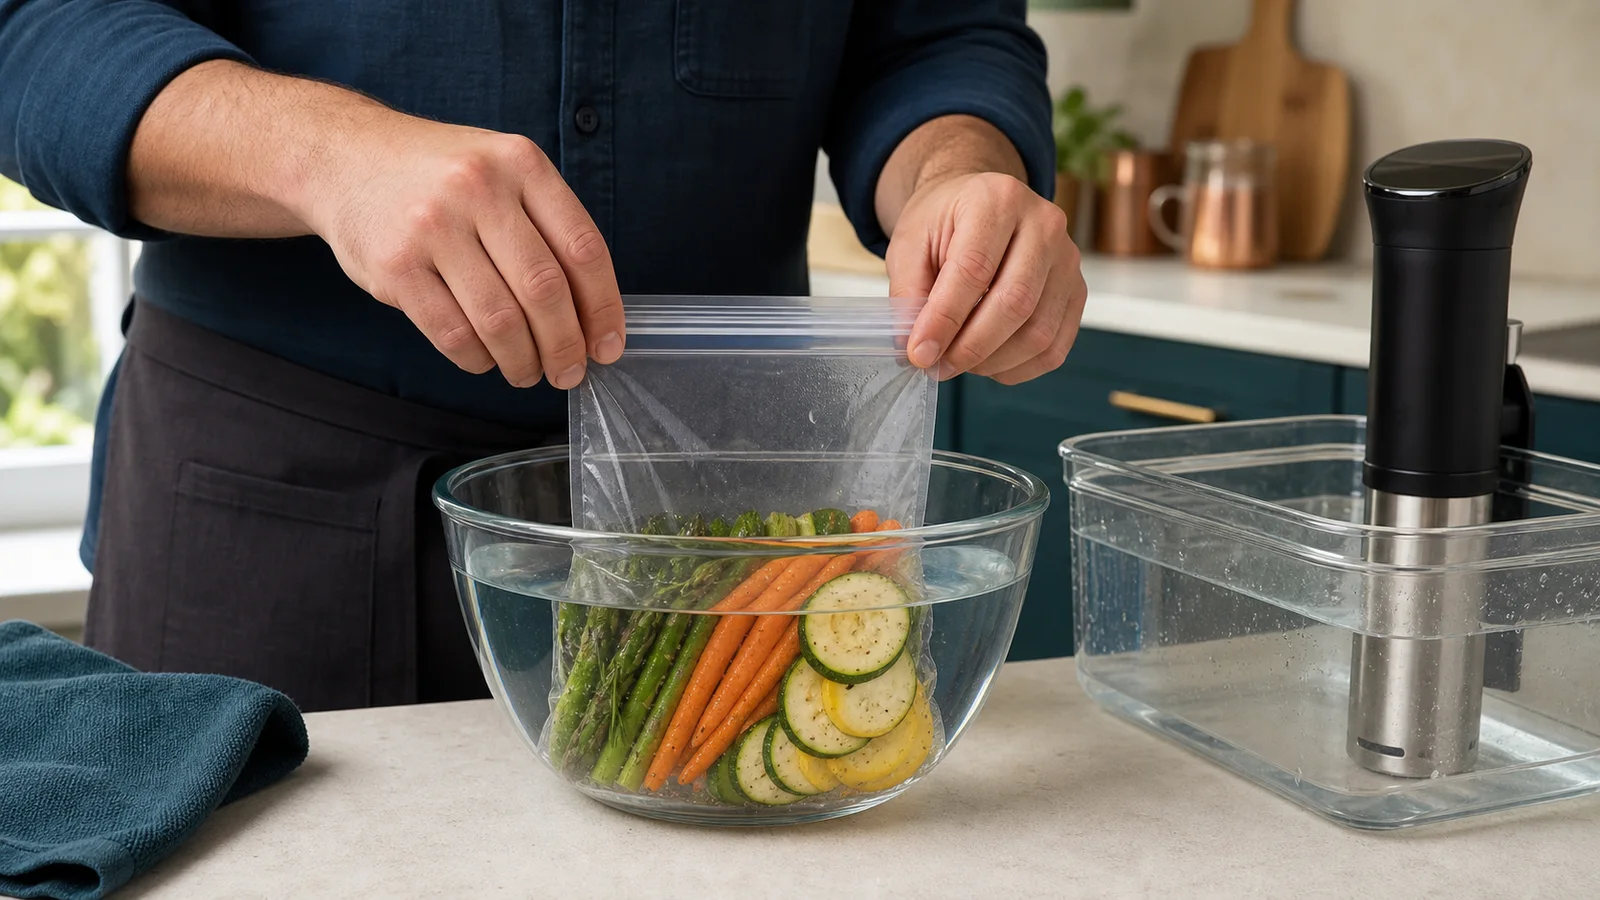
- Lower the pouch into cool water. Hold the open corner above the surface. Lower the food and the sealed part of the pouch slowly; do not submerge the opening.
- Move trapped air toward the opening. Let water pressure press the pouch against the food. Gently guide visible pockets upward instead of squeezing a sharp edge against the plastic.
- Seal before water reaches the closure. Close the final corner while it is still above the water line.
- Dry and inspect. Check the entire closure and the pouch for contamination, folds, punctures, or reopening. Rebag if the seal will not stay closed.
- Move to the heated bath. Clip the closed top above water and position the pouch so water can circulate around its broad surfaces without blocking the circulator.
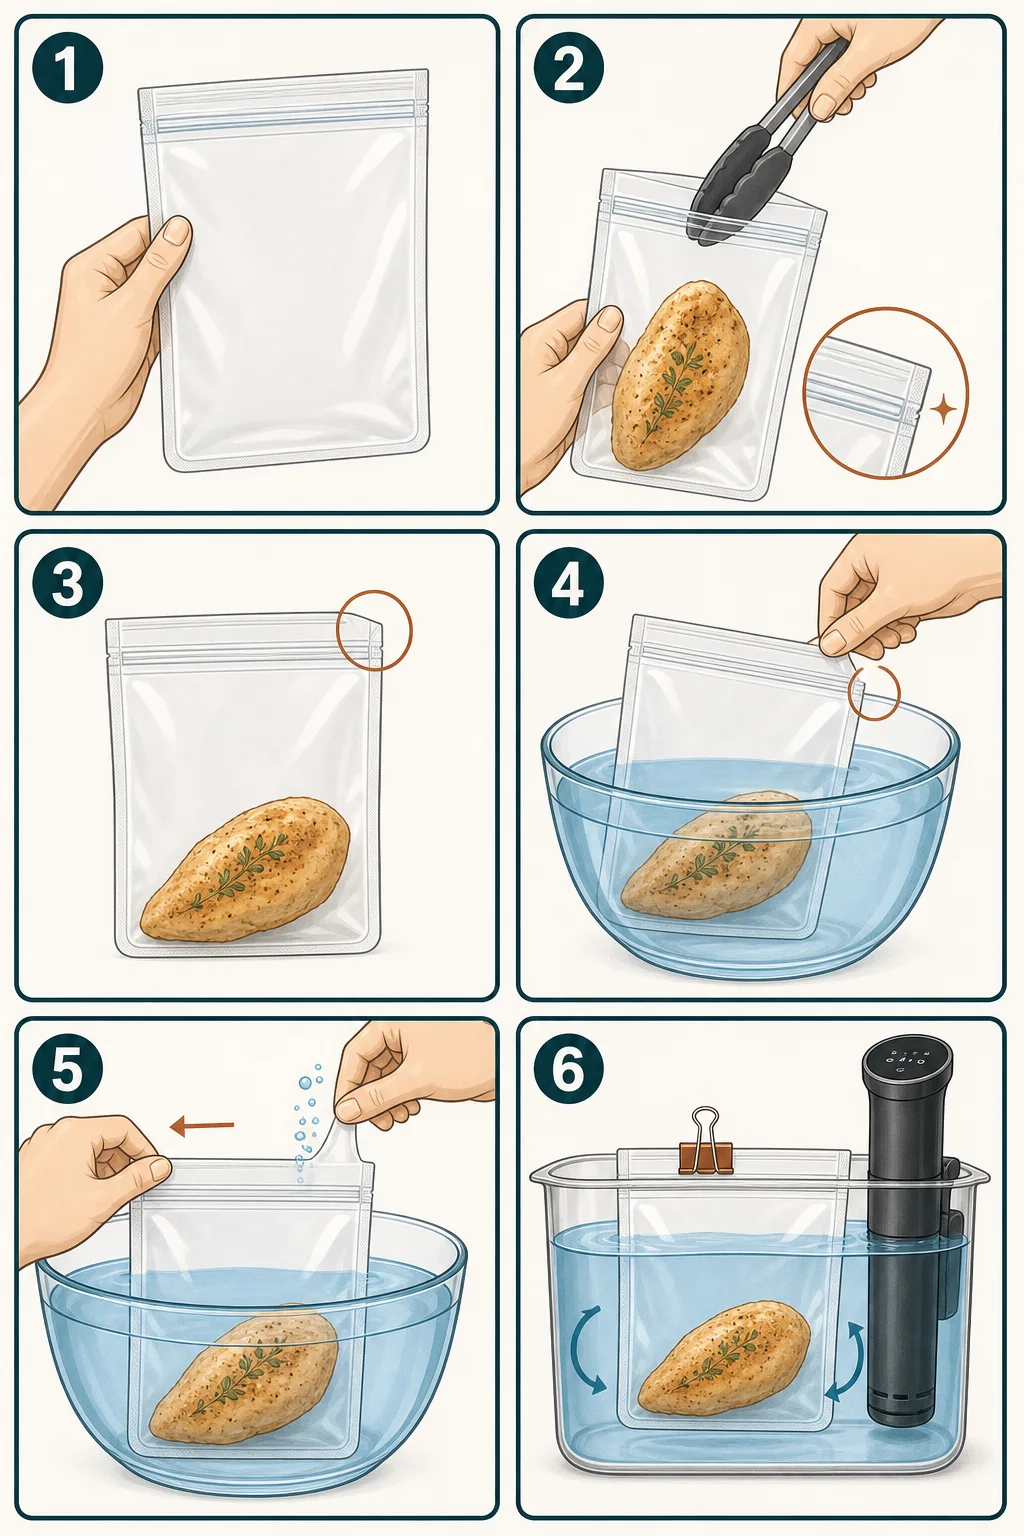
The goal is not to crush the food. It is to remove the large air pockets that keep parts of the pouch away from circulating water. Baldwin notes that trapped air is a poor heat conductor; a pouch that still balloons around the food needs another displacement pass.
If the food is wet or heavily marinated
Liquid near the closure is the main handling problem. Start with chilled contents and a larger pouch so you have generous dry headspace. Lower the pouch more slowly, and stop before the liquid climbs into the zipper track.
- A small amount of marinade: keep it below the food and guide air out without pushing liquid upward.
- Liquid repeatedly reaches the closure: do not keep wiping and hoping. Change to a larger or purpose-built reusable pouch whose closure you can keep clean.
- Mostly liquid food: use a recipe and container designed for that format, or a chamber-sealer workflow. This guide does not treat a leaking zipper pouch as a reliable liquid-cooking method.
When water displacement is the wrong tool
| Situation | Main risk | Better choice |
|---|---|---|
| The bath is near or above the pouch’s documented limit | Softening, seal failure, or use outside manufacturer instructions | A purpose-built pouch rated for that cook |
| Sharp bone, shell, or rigid edge presses on the film | Puncture | Protect the edge or use stronger purpose-built packaging |
| Liquid keeps wetting the closure | Incomplete or unstable seal | A larger approved pouch, suitable reusable pouch, or chamber sealer |
| A long cook will be unattended | Less opportunity to notice a loosening zipper or floating pouch | A heat-sealed sous vide pouch |
| You need repeatable batch packaging or freezer storage | Manual air removal and closures vary from bag to bag | A suitable vacuum sealer and compatible rolls or pouches |
If those conditions describe your normal cooking, our guide to vacuum sealers for sous vide explains which sealing workflows fit dry food, wet food, and more automated use.
Troubleshooting the seal
| What you see | Likely cause | What to do |
|---|---|---|
| The pouch floats immediately | A large air pocket remains | Return it to cool water, reopen one corner, and guide the air upward before resealing. |
| One pocket will not collapse | A fold or the food’s shape traps air | Reposition the food or use a larger pouch; do not force a sharp edge against the film. |
| The zipper gets wet before closing | Too little headspace or the pouch went too deep | Lift and dry the closure. Restart with a larger pouch if liquid keeps reaching it. |
| The pouch begins floating later | The closure loosened or gas collected | Check pouch integrity and use a rack or clip without blocking flow. Do not puncture the cooking pouch. |
| Bath water enters the pouch | The closure or film failed | Stop the cook. If raw juices may have entered the bath, replace the water and clean the container plus the circulator’s wetted parts exactly as their makers direct, following FoodSafety.gov’s clean-and-separate guidance. Use a clean approved pouch, then restart or recalculate a validated food-specific schedule from a known history; discard the food if its time-temperature history cannot be established. |
Packaging does not set the cooking time
Removing air helps the pouch contact circulating water; it does not determine doneness or pasteurization. Cooking time still depends on the food, thickness, starting condition, bath temperature, and safety objective, as detailed in Baldwin’s heating and pasteurization guidance. Use a validated food-specific schedule rather than shortening a cook because the pouch looks tightly sealed.
For food-specific guidance, use our chicken time and temperature guide or steak time and temperature guide. During preparation, follow FoodSafety.gov’s clean, separate, cook, and chill guidance; the sealing method does not replace safe handling.
Sources and methodology
This is a research-based how-to, not a hands-on test. We compared current technique instructions, bag-manufacturer use guidance, a technical sous vide reference, and federal food-handling guidance. Where sources disagreed about ordinary freezer bags, we deferred to the current instructions for the exact product. Sources were checked July 30, 2026.
- Anova: Water Displacement Method for Sous Vide Cooking
- Anova Support: Immersion Method
- Douglas Baldwin: A Practical Guide to Sous Vide Cooking
- Ziploc official FAQ
- FoodSafety.gov: 4 Steps to Food Safety
The bottom line
Use water displacement when you have a manufacturer-approved resealable pouch and can keep its closure clean, dry, and above water. Choose purpose-built or heat-sealed packaging when the bag limit, sharp food, liquid, or unattended cook makes that closure the weak point.