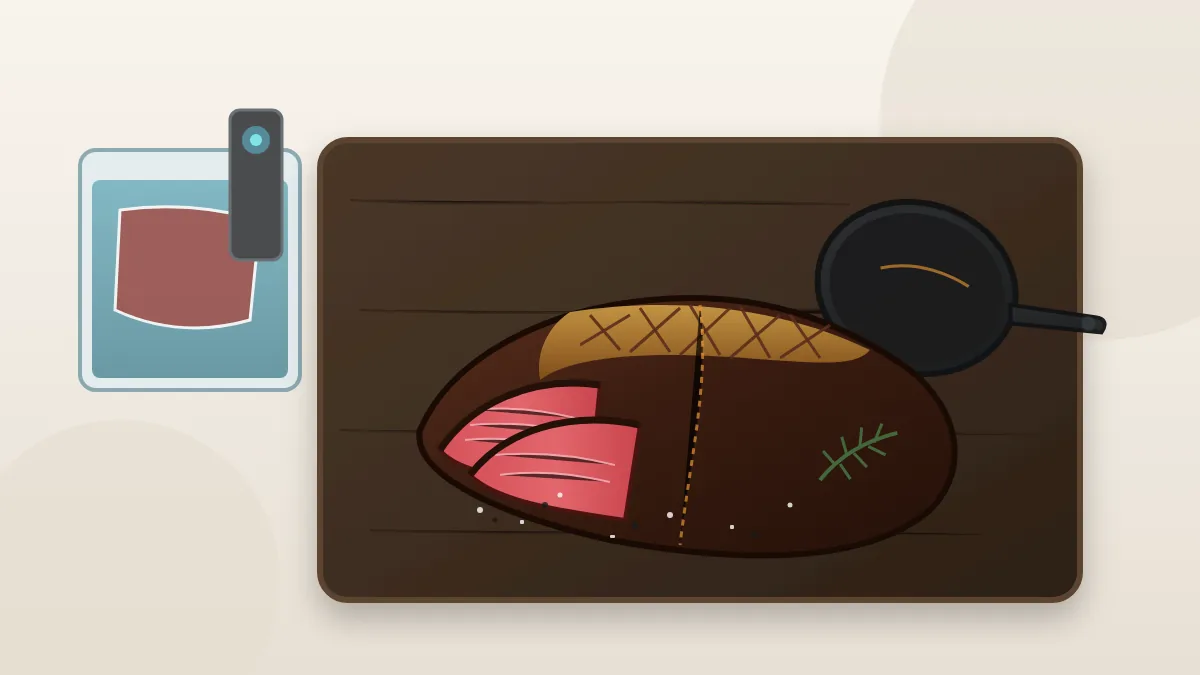
For medium-rare tri tip with a steak-like texture, set your immersion circulator to 131°F to 133°F (55°C to 56°C), or 136°F to 140°F (58°C to 60°C) for medium, and cook for 3 to 5 hours. For a typical 2- to 2.5-inch thick (50–65 mm) thawed bottom sirloin roast starting from refrigerator temperature (41°F / 5°C), heat transfer models require at least 2.5 hours just to bring the geometric core up to bath temperature. The 3- to 5-hour window gently tenderizes muscle fibers while preserving firm resilience and juiciness. Keep two essential rules in mind: prolonged cooks beyond 8 to 12 hours cause excessive structural breakdown, leaving the meat unusually soft and mealy; and you must never slice the whole roast in a single continuous direction. Tri tip muscle fibers run in two distinct opposing angles meeting at a central elbow seam, requiring you to divide the roast before slicing against the grain.
Tri Tip Temperature and Doneness Guide
Tri tip is a cut from the bottom sirloin (tensor fasciae latae). Unlike ribeye or strip loin steaks that cook in under two hours, tri tip is an irregular, tapered roast ranging from 1 inch at the tail to 2.5 or 3 inches at the thickest lobe. Sous vide solves the chronic problem of dry heat roasting, where the narrow tail dries out before the center reaches medium-rare.
| Doneness | Water Bath Temperature | Recommended Time (Thawed) | Internal Color & Texture | Safety & Process Limit |
|---|---|---|---|---|
| Rare | 125°F – 129°F (51.5°C – 54°C) | 2 to 2.5 hours max | Deep red, cool-warm center, soft chew with slight resistance | Immediate service only. Bath sits in bacterial growth zone; not pasteurized. Never use for cook-chill. |
| Medium-Rare (Recommended) | 131°F – 133°F (55°C – 56°C) | 3 to 5 hours | Uniform ruby pink, tender, juicy, minimal moisture loss | Safe for extended baths. Achieves thermal pasteurization at 4.5+ hours. |
| Medium | 136°F – 140°F (58°C – 60°C) | 3 to 5 hours | Rosy pink center, firmer bite, higher fat rendering | Excellent choice for heavily marbled Prime roasts with thicker fat caps. |
| Medium-Well | 145°F – 150°F (63°C – 65.5°C) | 2.5 to 4 hours | Pale pink fading to gray, firm, noticeable moisture loss | Protein begins significant moisture expelling above 140°F. |
| Well-Done | 155°F+ (68°C+) | 2 to 3.5 hours | Completely gray-brown, dry, dense bite | Not recommended for lean bottom sirloin cuts. |
Critical Safety Boundary: Temperatures below 130°F (54.4°C) sit inside the food safety temperature danger zone where bacteria such as Clostridium perfringens can multiply. If cooking rare at 125°F to 129°F, strictly limit total water bath time to 2.5 hours and serve immediately upon searing. Never hold meat below 130°F for long periods, never use low-temperature baths for cook-chill storage, and never serve unpasteurized rare meat to vulnerable diners.
Cooking Time vs. Texture: How Longer Cooks Change the Meat
One of the most frequent misconceptions with sous vide beef is treating every roast like a pot roast. If you have cooked our sous vide chuck roast guide, you know that chuck requires 24 to 36 hours to convert dense collagen into gelatin. Tri tip is anatomically distinct.
Cut from the bottom sirloin, tri tip has relatively low connective tissue and moderate marbling. In a 131°F water bath, it behaves like an oversized, thick-cut steak rather than a braising roast. Extended cooking changes its texture along a distinct curve:
- Under 2.5 hours: Insufficient heating. For a 2- to 2.5-inch thick slab (50–65 mm) starting at 41°F (5°C), thermal transfer tables (Douglas Baldwin) demonstrate that it takes approximately 2 hours and 15 minutes just for the geometric center to reach 1°F below bath temperature.
- 3 to 5 hours (The Optimal Texture Window): The entire roast reaches thermal equilibrium, and endogenous enzymes (calpains and cathepsins) gently soften muscle fibers while preserving firm resilience, juiciness, and clean steak-like bite.
- 6 to 8 hours: Fiber softening accelerates. Slices become noticeably more tender but begin losing their elastic steak character.
- 10 to 24 hours (Textural Breakdown): Extended enzymatic action breaks down structural protein networks (actin and myosin) excessively. The beef loses chew resilience, becoming unusually soft, mealy, or pate-like, while shedding significant moisture into the bag purge. This is a quality and texture failure, not a safety defect, but it compromises the cut’s character.
Fat Cap Trimming and Seasoning Mechanics
Tri tip roasts generally arrive in one of two configurations at butcher counters: fully trimmed (“peeled”) or untrimmed with a generous 1/2-inch subcutaneous fat cap. How you handle this fat layer determines the quality of your finished sear.
Beef tallow does not melt or render significantly at sous vide temperatures between 130°F and 135°F. Thermal rendering of dense external beef fat requires temperatures exceeding 140°F, and ideally direct skillet heat above 300°F. If you submerge a tri tip with an untrimmed 1/2-inch fat cap into a 131°F bath for 4 hours, that fat will emerge soft, white, and gelatinous. A brief 90-second sear in a pan is not long enough to render half an inch of solid fat without severely overcooking the red meat beneath it.
The Trimming and Scoring Rule
- Trim to 1/8 to 1/4 Inch: Using a sharp boning knife, shave down the thick white fat cap until a thin, uniform blanket (about 1/4 inch thick) remains over the meat. Trim away any loose silver skin or ragged edges on the lean side.
- Score a Crosshatch Pattern: Cut shallow diagonal slits roughly 1/2 inch apart across the fat cap, cutting through the fat but stopping just before you pierce the lean muscle. Scoring allows high skillet heat to penetrate the fat layer quickly, rendering liquid tallow during the final sear and preventing the roast from curling up in the pan.
- Apply a High-Adhesion Dry Rub: Tri tip is traditionally seasoned in the California Santa Maria style. Because bag juices dilute delicate rubs during cooking, use coarse, robust seasonings that adhere to the surface:
- 1 tablespoon coarse kosher salt
- 1 tablespoon freshly cracked coarse black pepper
- 1 tablespoon granulated garlic powder
- 1 teaspoon onion powder
- 1/2 teaspoon smoked paprika or dried rosemary
Apply the rub generously to all sides before packaging. Avoid adding raw liquid oils or butter to the bag; fat-soluble flavor compounds leach out of the beef into added cooking fat, stripping away rich meaty flavor rather than enhancing it.
Bagging and Air Pocket Prevention
Because tri tip has a curved, irregular triangular profile, sealing it presents unique practical challenges. In standard vacuum bags, suction channels often pinch closed around the narrow point before air is evacuated from the inner elbow crook, leaving an insulating air bubble that causes the bag to float in the water bath.
- Vacuum Sealer Method: If using one of the best vacuum sealers for sous vide, position the roast so the tapered end points toward the bottom of the bag and the thick base faces the open mouth. Smooth out folds along the crook with your fingers as the vacuum cycle runs to prevent trapped air pockets.
- Water Displacement Method: If you are cooking without a vacuum sealer, use a heavy-duty gallon-sized freezer zipper bag. Lower the bagged roast slowly into your water bath, allowing water pressure to force the air up and out of the crevices around the crook before sealing the zipper just above the water line.
- Combating Buoyancy: If your bagged roast floats, do not allow it to cook with exposed surfaces above the waterline. Weigh it down using a sous vide rack, stainless steel food-safe weights, or a heavy ceramic plate.
Searing the Curved Roast in Cast Iron
Achieving a deeply browned, crispy crust on a tri tip requires managing both moisture and geometry. When you remove the roast from the bag, its surface will be coated in warm liquid purge. Searing wet meat causes steam to flash off the pan, limiting the cooking surface to 212°F (100°C) until all water evaporates—by which time your red medium-rare interior has developed a thick, overcooked gray band.
Follow this exact searing procedure:
- Blot Aggressively Dry: Remove the roast from the bag and place it on a wire rack or cutting board. Use 4 to 6 heavy paper towels to firmly press and dry every surface until the meat feels completely matte and slightly tacky to the touch.
- Heat Cast Iron to Smoking Point: Place a 12-inch heavy cast-iron skillet over high heat until wisps of smoke appear. Add 1 to 2 tablespoons of high-smoke-point oil (such as avocado oil, clarified butter, or beef tallow).
- Sear Fat-Side Down First: Lay the roast into the hot oil with the scored fat cap against the pan. Sear for 60 to 90 seconds. The direct heat renders the thin fat layer into a sizzling, golden crust.
- The Pressure Press (Overcoming the Curve): Because tri tip has a curved boomerang shape, the center crook naturally arches upward and bridges off the bottom of a flat skillet. When searing the flat lean sides, use a cast-iron grill press or press down firmly on the center hump with heavy kitchen tongs for the first 30 seconds. This forces complete surface contact and eliminates pale un-seared patches.
- Flip and Sear the Remaining Surfaces: Sear the lean bottom and side edges for 45 to 60 seconds each. Total skillet contact time should not exceed 3 to 4 minutes to avoid warming the core beyond your bath setting.
- Optional Butter Baste: In the final 30 seconds of searing, drop 2 tablespoons of unsalted butter and a bruised sprig of rosemary or thyme into the pan. Tilt the skillet and spoon the foaming butter over the crust before transferring the roast to a carving board.
The Two-Direction Carving Protocol (The Seam Method)
You can execute every step of water bath heating and pan searing with surgical precision, but if you carve tri tip incorrectly, the meat will still taste stringy and tough. Tri tip is famous in culinary anatomy because its muscle fibers do not run in a single parallel direction from one end to the other.
Anatomy of the Radial Seam
Tri tip has two distinct muscle grain orientations meeting at an invisible center “elbow” or seam:
- The Tapered Tip (Narrow End): Muscle grain runs lengthwise, parallel to the long outer edge of the triangle, traveling from the thin tip toward the center crook.
- The Wide Base (Thick End): At the center crook, the grain pivots roughly 45 to 90 degrees. Muscle fibers fan out diagonally toward the broad, flat edge of the roast.
If you slice a tri tip straight across from tip to base like a traditional beef roast, you are slicing across the grain on one half, but slicing parallel with the grain on the other half. Slicing with the grain leaves intact, long muscle fibers that resist chewing, making tender beef feel leathery.
Step-by-Step Carving Process
- Locate the Pivot Seam: Place the seared roast on your cutting board with the fat cap facing up. Inspect the surface fibers under good overhead light. You will clearly see the grain direction shift near the midpoint where the roast begins to bend.
- Halve the Roast Along the Seam: Cut the roast cleanly in two pieces directly along the line where the muscle fibers change direction. You now have two manageable cuts: the narrow tapered lobe and the broad base lobe.
- Rotate Each Piece 90 Degrees: Turn each half independently so that its muscle fibers run horizontally across your cutting board from left to right.
- Slice Against the Grain: With a sharp, long slicing knife or carving blade held at a slight 45-degree angle, carve thin, pencil-thick ribbons (1/4 inch or thinner) strictly perpendicular to the grain fibers.
Carving across the grain severs the long structural muscle fibers into microscopic lengths. Every bite releases immediately upon chewing, delivering the melt-in-your-mouth tenderness for which bottom sirloin is prized.
Food Safety and Storage Boundaries
When cooking large beef roasts at precise lower temperatures, ensure your execution respects sound food microbiology:
- Intact Muscle vs. Blade-Tenderized Beef: Whole subprimal cuts like tri tip are sterile on the interior; bacteria reside almost exclusively on the exterior surface, where searing and water bath heating rapidly eliminate them. However, if your roast was labeled “mechanically tenderized” or “blade tenderized” by your butcher, surface needles have punctured into the core, driving surface pathogens deep inside. Mechanically tenderized beef must reach thermal pasteurization (at least 131°F for 4.5 hours per Baldwin tables) or be cooked to a minimum internal temperature of 145°F with a 3-minute rest.
- Cook-Chill and Storage (Two-Stage Cooling): If you are not serving the roast immediately, do not place a hot vacuum-sealed bag directly into the refrigerator. A warm 2.5-inch thick beef roast cools far too slowly in home refrigerators, lingering in the bacterial danger zone (40°F–135°F) for hours and creating risks of spore germination. Follow the standard two-stage cooling parameter (FDA Food Code 3-501.14): cool from 135°F down to 70°F within 2 hours, and from 70°F down to 41°F or below within an additional 4 hours (6 hours total). In a home kitchen, achieve this safely by submerging the sealed pouch in a heavily agitated 50/50 ice-water slurry (by volume) with enough excess floating ice to keep the water bath near 32°F until the core drops to 41°F (typically 60 to 90 minutes for a 2-inch slab). Once chilled, refrigerate for up to 5 days or freeze for up to 6 months.
- Reheating Bounded Rules: Reheat refrigerated tri tip in a water bath set 1°F below your original cooking temperature (e.g., 130°F for a 131°F cook) for 1.5 to 2 hours, then re-sear briefly in a hot skillet.
Troubleshooting Common Tri Tip Mistakes
| Symptom | Root Cause | Practical Correction |
|---|---|---|
| Half the slices are tough and chewy | Carving straight across the whole roast, slicing with the grain on one section. | Split the roast at the center seam into two distinct pieces. Reorient each piece and slice strictly perpendicular to the grain. |
| White, rubbery fat after searing | Fat cap was left untrimmed at 1/2 inch; 131°F bath does not render solid beef tallow. | Trim fat cap down to 1/8–1/4 inch and score a crosshatch pattern before cooking. Sear fat-side down first. |
| Meat texture is mealy and mushy | Cook time exceeded 8 to 12 hours. Tri tip lacks collagen and breaks down under excessive enzymatic action. | Strictly cap water bath time between 3 and 5 hours. It is an oversized steak, not a 24-hour chuck roast. |
| Bag floats in the water bath | Air trapped in the triangular crook during vacuum sealing. | Smooth out folds along the crook during sealing, use water displacement, or weigh down the pouch with a sous vide rack. |
| Pale, un-browned strip down the center | Curved boomerang shape bridged off the flat skillet bottom. | Use a cast-iron grill press or hold firm downward pressure on the crook with tongs for the first 30 seconds of searing. |
How Tri Tip Fits Your Sous Vide Rotation
Tri tip occupies a unique sweet spot in home cooking: it delivers the rich beefy punch and tender texture of a thick-cut steak, but feeds a family or dinner party at half the cost per pound of ribeye or tenderloin. Before setting up your cook, consult our sous vide compatibility checklist to confirm roast thickness and water bath calibration, or compare techniques with our sous vide steak temperature guide when cooking individual single-portion cuts.